
It has been a while since my last blog post! This is, of course, the first blog post on this website—my last post, and everything that I have written before can be found on my original WordPress blog here. If you have found my blog and would like to receive posts and information about my projects in your email inbox, you can join my newsletter here.
I have been slowly picking away at the current commissioned build over the past couple of months, but things kept getting in the way (the new school year, lots of teaching, various performances (including Duo Estelle‘s debut tour in Saskatchewan and a CD release concert for Vespers), and everything else that I have tried to fit in). November is looking more promising for building projects. I even have, for the first time in what seems like months, the entirety of this weekend at home! So, yesterday, I finished up the process of inlaying the rosette into this guitar, and today I thinned the top and started to brace it before getting to work on a new building mould/workboard.
The current project is a copy of a 1936 Fleta guitar (take a look at the original guitar here), which itself is a structural copy of a Torres guitar (FE 17). As I do not have in-person access to either the Torres or the Fleta, I am having to do a lot of sleuthing to figure out the best way to design and build this instrument. I am, of course, referencing Romanillos’ book quite heavily (thank you, Dad, for the loan! I need to get my own copy), and have studied the pictures of the Fleta thoroughly on the Guitar Salon website. While it might not be entirely correct to call what I am doing a “copy,” it is going to be quite close and fairly historically informed (although, as you’ll see pretty soon, I am going to take advantage of some modern developments in tools and glue).
I started the build by jointing the top and back plates, and then I got to work on creating the mosaic tiles and herringbone for the rosette and other inlay work on this intricate guitar. This guitar definitely has the most involved inlay work of any of my builds to date, so I am both excited and exhausted at the prospect of putting everything together neatly.
I followed the instructions in Bogdanovich’s book to create the herringbone inlay (he calls it a wheat motif, but if you just adjust the angles a bit, it turns into some pretty nice herringbone). I won’t go into detail about the process here this time around.
The rosette for the Fleta requires two different mosaic tiles as well as several stripes of varying thicknesses and the aforementioned herringbone. The mosaic tiles turned out quite well, so I’ll detail the process here.
I started by drawing out the tiles on graph paper to figure out how much of each colour I would need. The tiles for this design are both 9×11 squares made up of various pieces of white, black, green, and red veneer. Once I knew what colours I needed, I sliced up enough 1cm wide strips of 0.5mm thick veneer sheets to fulfill the order. I then stacked up the colours to create piles of veneer that corresponded to each vertical slice on my graph-paper design.
Here is the process for the 3rd vertical slice of the first mosaic tile (not that this identification will mean anything to you as a reader). I started by laying out the 11 pieces of veneer:
I then applied a bead of polyurethane glue to each piece of veneer. The polyurethane glue was a game changer from the last time I made one of these mosaic rosettes—it is much stronger for this type of work and, while messier, creates a better product. I learned this in passing from a much more experienced luthier, Joshia de Jonge.
The veneers were then stacked up against a block of wood (thoroughly covered in packing tape to prevent any undesirable adhesion):
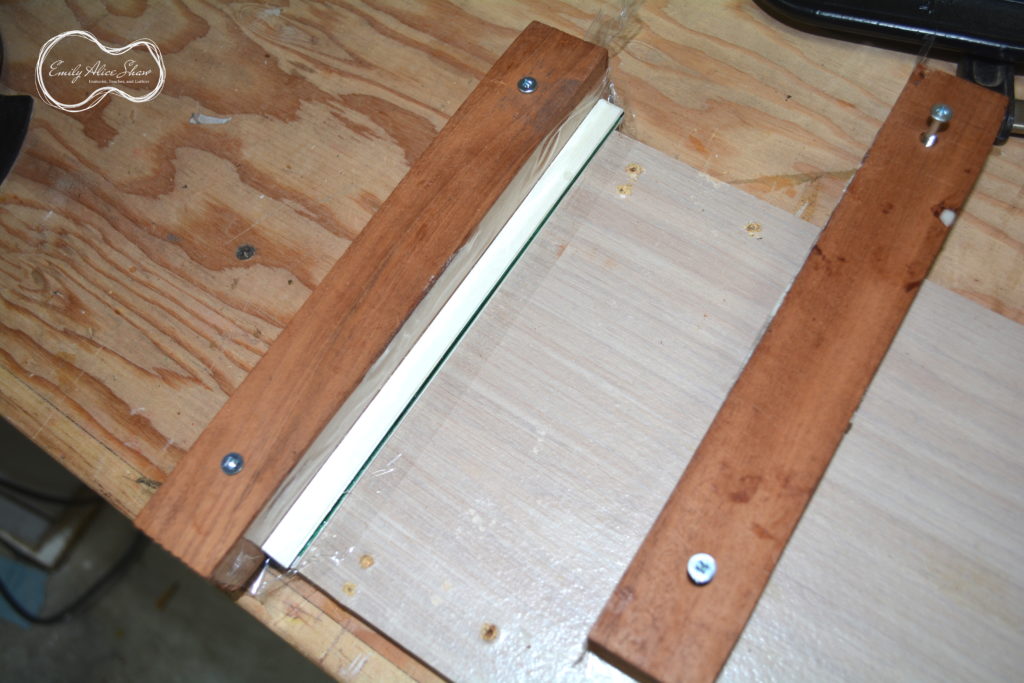
Then I screwed the second block into place in order to create a solid clamping jig, and then applied even pressure with a caul and a few clamps.

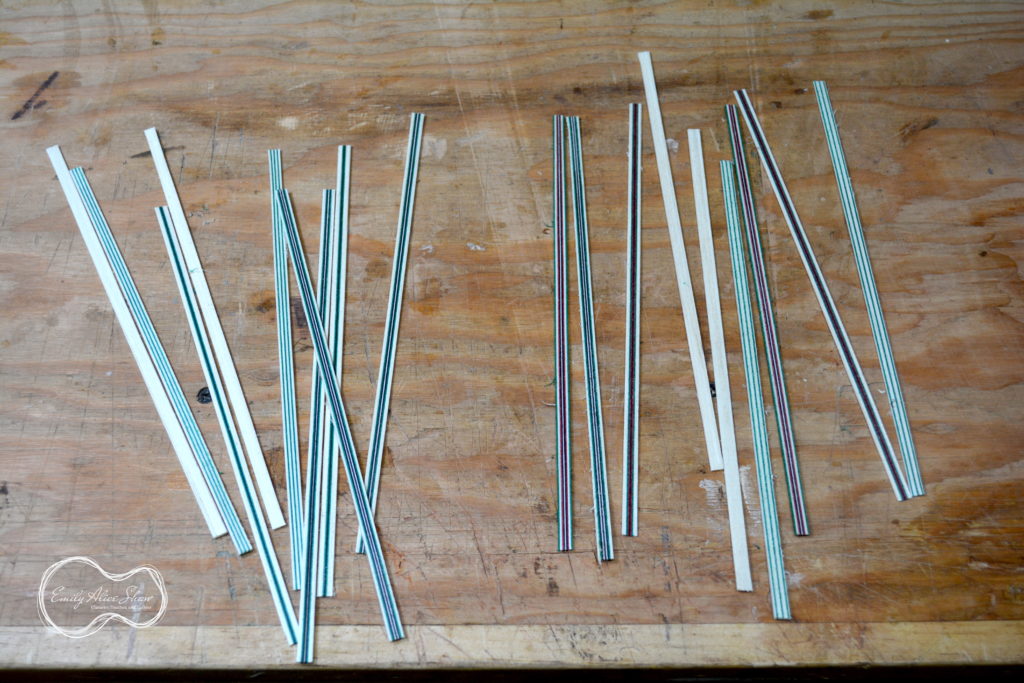
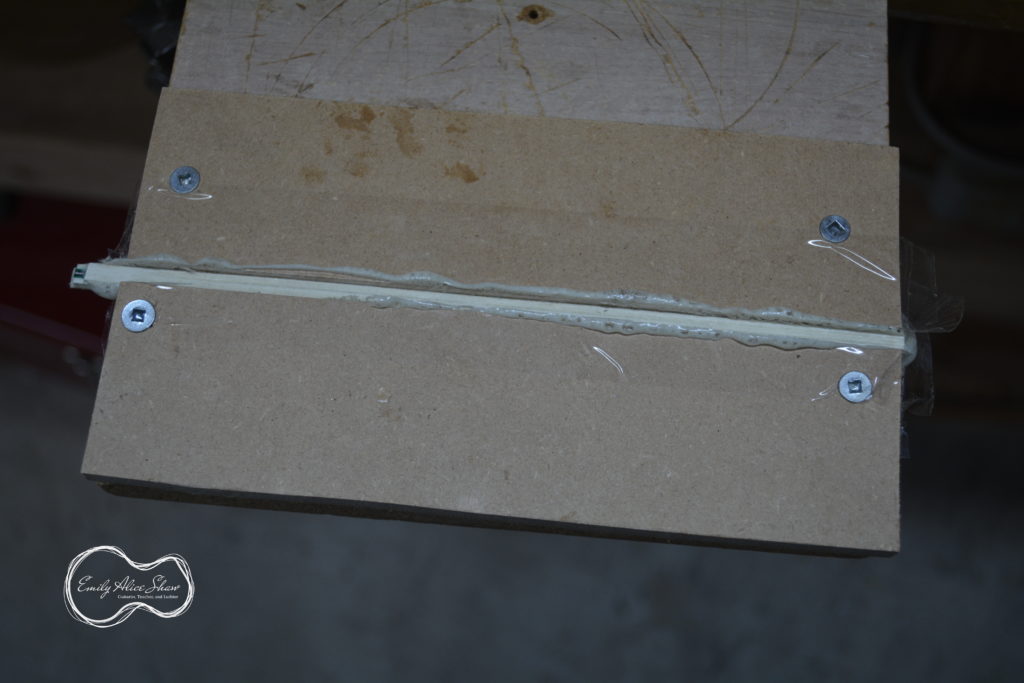
When this step was finished, I had 10 stacks of veneer. I then sliced off long thin pieces from the side of each log with my bandsaw, and then thinned each piece to be 0.5mm thick using a sharp plane and my drill-press thickness sanding set up. Here are the stripes:
These pieces then needed to be glued up to form a mosaic log, so I applied polyurethane glue to each of the pieces and then stacked them up in a similar jig to the first logs.
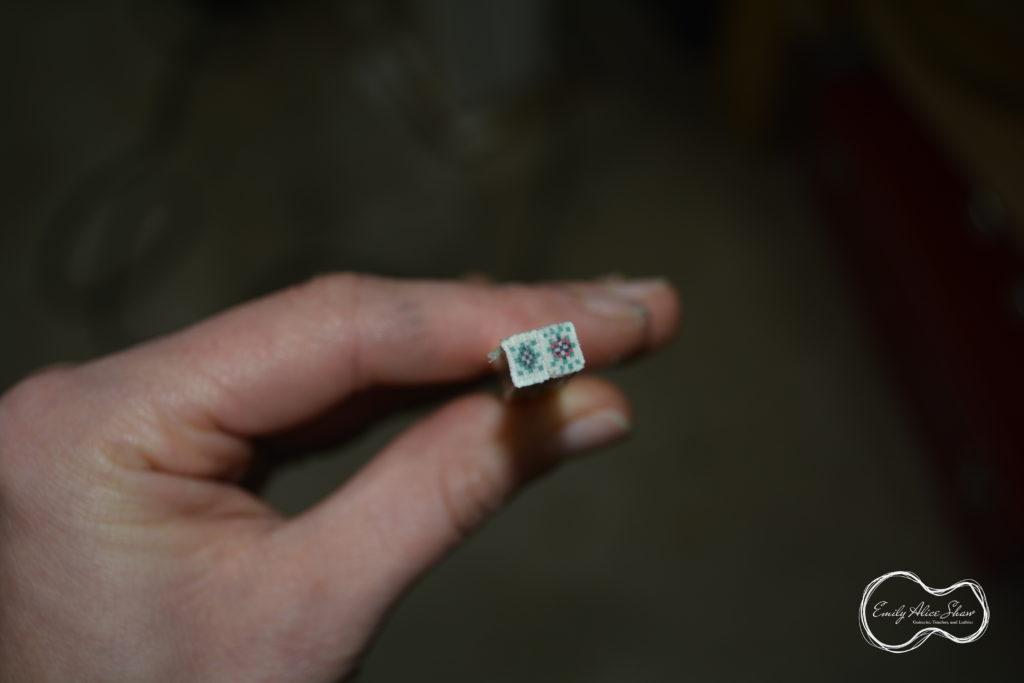
The desired mosaic tile patterns appeared beautifully on the ends of these logs, as you can see here (the 2 logs held side-by-side):
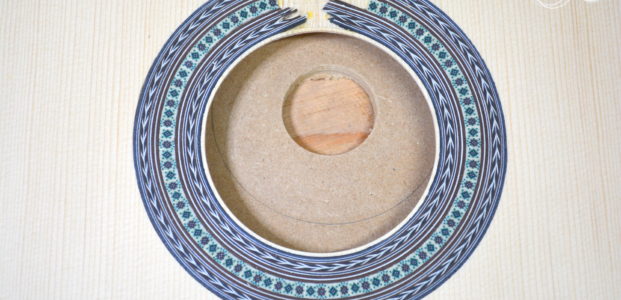
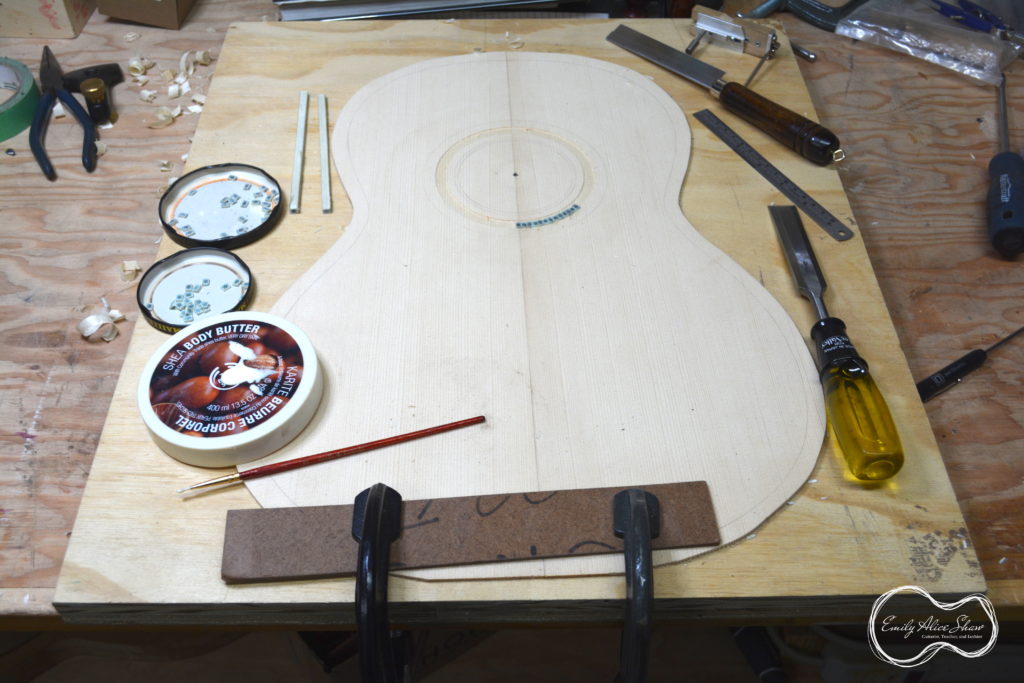
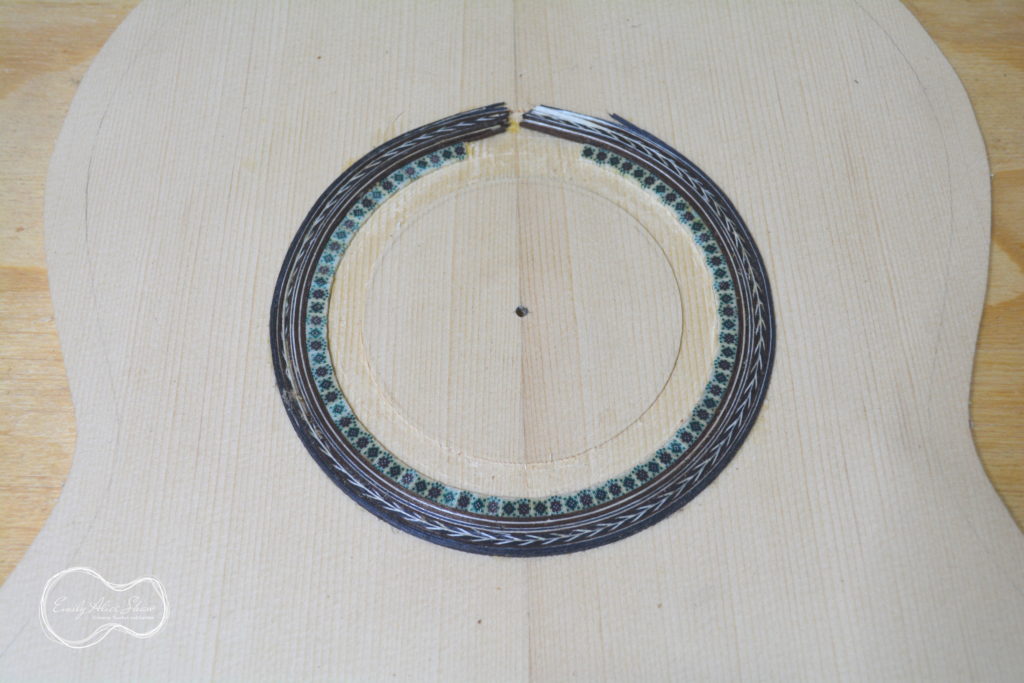
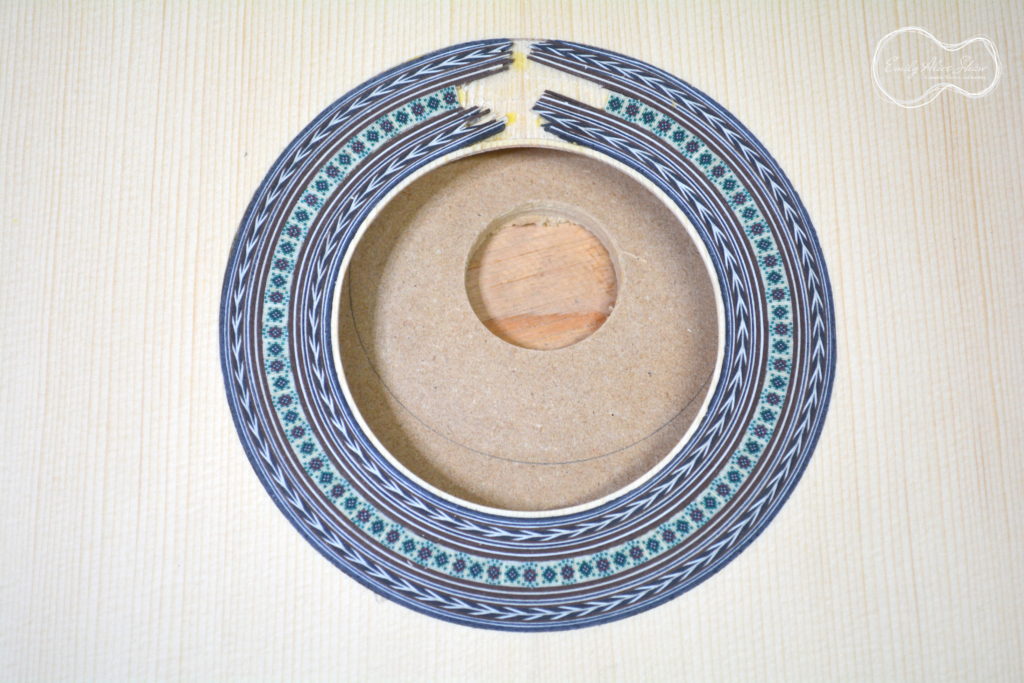
The logs were then sliced up with a small razor saw to create the tiles that were then inlayed into the soundboard for the rosette. I used a handheld circle cutter to scribe the outside edges of the rosette, and then excavated the area with a small router plane. I only excavated the middle of the rosette to start with so that the tiles would end up in the right place. I excavated the rest of the rosette after the mosaic tiles were all in place.

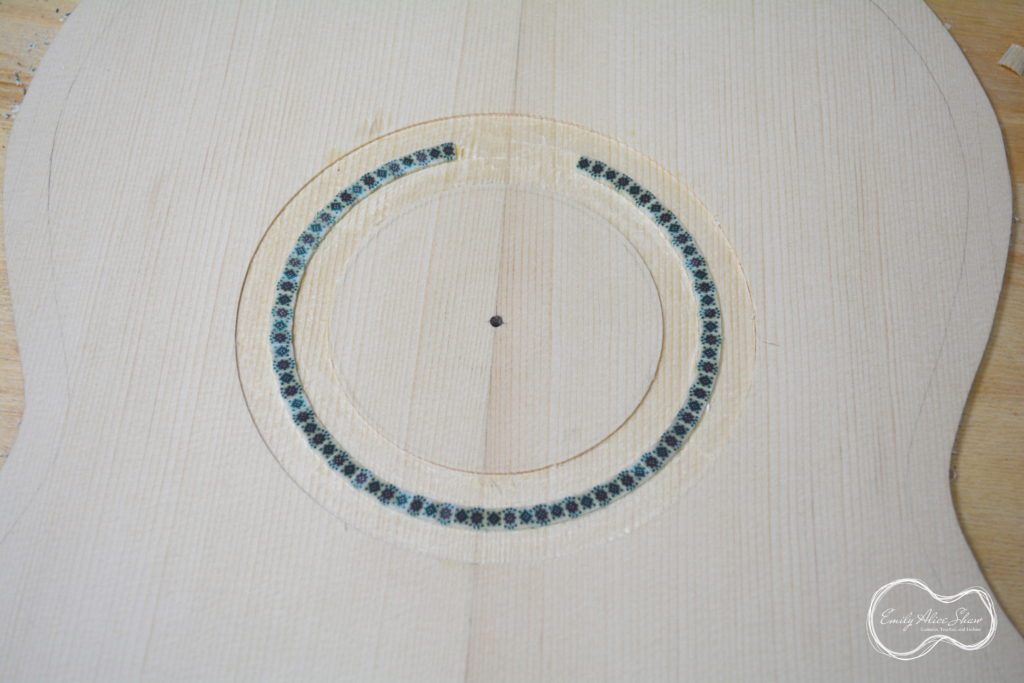
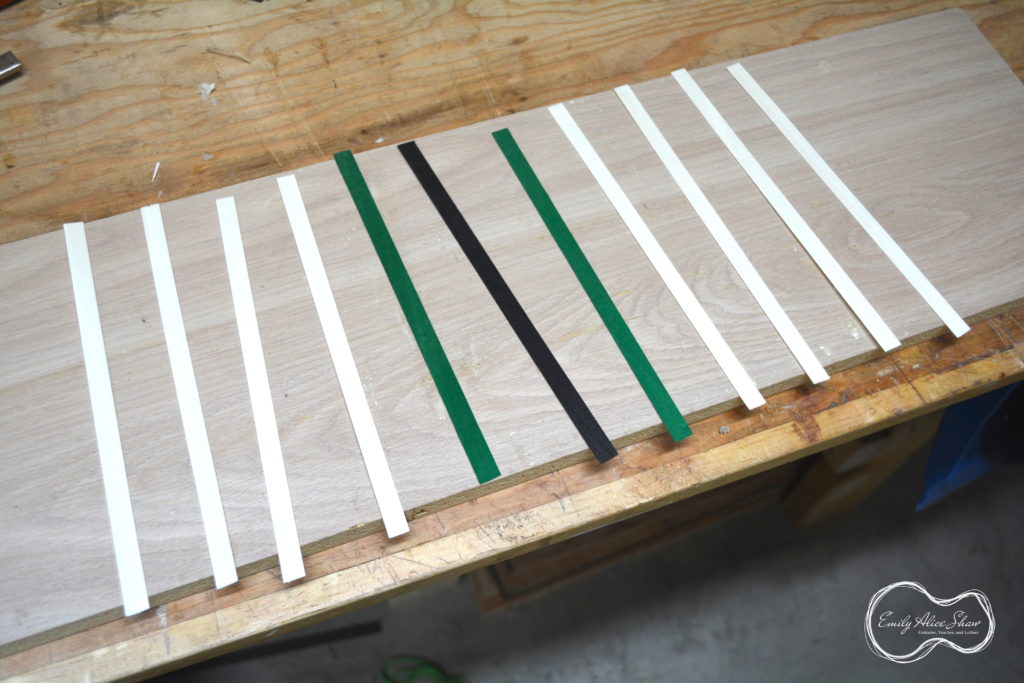
The rest of the rosette took considerably less effort, although it was still a slightly finicky process as I had to glue in about 16 thin strips of wood on either side of the mosaic section. Most of those strips were 0.5mm thick, however, some of the stripes needed to be 0.25mm thick, so I had to thin my veneer strips down using my drill-press thickness sanding set up. Here, you can see the first half of stripes glued into place:
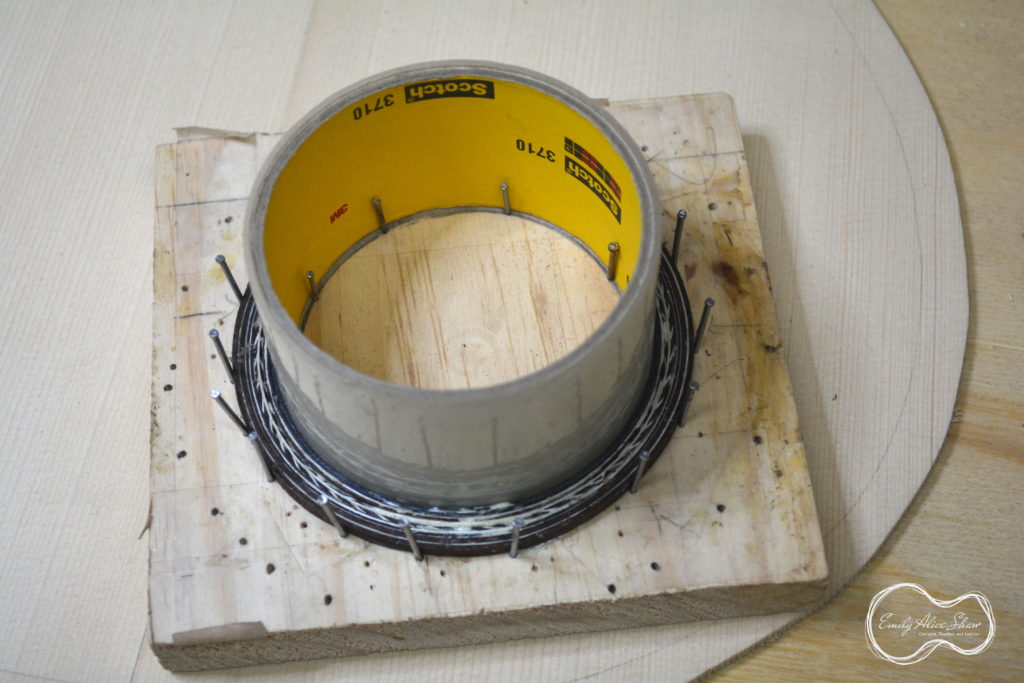
In order to make sure that all of the strips were seated down properly into the channel, I first glued the strips together around an appropriately sized round object (tape rolls worked very well). I did not let the glue dry completely so that they would still be somewhat flexible.
I used a sharp blade to carefully level the underside of the glued strips before fitting them into the soundboard. When both sets of stripes were inlayed, I spent a bit of time levelling the inlay before thinning the soundboard (from the other side) and cutting out the soundhole.
Ta-da!
Once I have applied some amber-toned shellac to the soundboard, I think it will look pretty similar to the original. Don’t mind the messy bit at the top—I’ll be tidying that up before covering all of my sins with the fingerboard.
I have 2 other guitars to be working on as well. One is a cedar-topped lattice-braced classical for a customer; the other is something a bit more unusual for my own purposes. I’ll keep you posted on both builds as they progress.
Thanks for reading!
Are any of these for sale?
Jamesmanueleguitar@gmail.com
Thank you
James
I don’t have any completed guitars for sale at the moment (fall 2021), but if you are interested in commissioning a guitar, you are always welcome to send me an email (emilyshawguitar@gmail.com)
Nice work on that Fleta rosette Emily.
I’ve just finished a similar rosette for a cedar top classical I’m working on. Method similar to yours but for the inner and outer strips I glued in the strips with a plastic filler and then pulled the filler out and inlaid the herring bone separately.
Cheers Martin